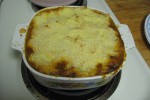
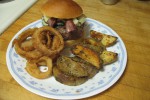
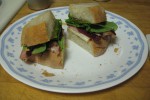
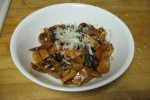
Thanksgiving has come and gone for most of us, Americans and Canadians alike, but I thought I’d take you inside of a typical Thanksgiving dinner in my insanely Italian — insane and Italian — household at my parents’ house. You’ll be surprised at the simplicity, I think.
Ohh! It’s your lucky day! Here’s the recipe!
***This year, only tangerines were available in the fridge. They didn’t work so well. Ask Dom.
But yeah, that’s pretty much all that happens on my Thanksgiving table. I usually do the 1 plate special.
One dish that I have been working my whole life perfecting is risotto. “Risotto” is the Italian word for rice, but the term has evolved into a method of cooking. It involves cooking a short grain rice, like Arborio, in a very gradual and methodical fashion and yields a smooth, silky almost soup of rice. I’ve seen versions in which other grains or even small dices of potatoes are cooked in this fashion, and that’s what I mean when I say it’s evolved into a method of cooking.
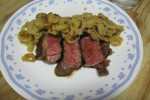
Risotto is usually an appetizer or “primi piati” in an Italian meal; I like to try to break some rules. I recently cooked sirloin steak with wild mushroom risotto on the side.
The inspiration for this meal was a walk through the Troy Farmers Market. There is a mushroom stand there, and they always have brilliant looking mushrooms. I really liked the way their oyster and shitake mushrooms looked, so I bought a good handful of both.
Actually, I cleaned everything and removed the stems. Those went into a pot with a quart of water and some fresh shallots, garlic cloves, salt and pepper; this was brought to a simmer for about 30 minutes. The result was a delicious mushroom stock.
I couldn’t stop there with the mushrooms though (I didn’t make a mushroom belt. QUICK! NAME THE MOVIE!). I decided to try porcini mushrooms. Around here, these mushrooms only come dry, so I bought some dry (from Honest Weight) and reconstituted them in about 1 cup of warm to hot water.
After about a ten minute soak, I removed the mushrooms from the liquid and reserved the liquid.
Then I got all four burners ready for a cooking marathon. Things at this point are all over the place!
Things moved quickly at this point, so I gathered some other ingredients.
Here’s the part of this you’re not gonna want to miss:
To make the risotto, you’re going to have to commit to standing in front of the stove stirring for about 20 minutes. In a saute pan, I started with about 2 tablespoons of olive oil, a nicely sized, finely diced shallot, and some salt. I cooked the shallot over medium heat until soft. Then, I added enough rice to cover the bottom of the pan (It probably took me a cup and a half to two cups). I toasted the rice in the oil and shallot for a couple of minutes. Addition of liquids should commence when the rice is nice and hot. My first liquid addition was the warm porcini broth. I continually stirred the mixture. As the rice absorbed all of the liquid, I made subsequent liquid additions (about 1/2 cup at a time) from the mushroom broth I had heating on the back burner. Each time, as the rice absorbed the liquid, I added more. When the rice looked almost cooked and the rice had absorbed most of the liquid, I tasted it. I was looking for the rice to be aldente (meaning there would be a little part of the center of the grain still tough). I was also looking to adjust the salt level. At this point, I added a little more liquid. This is the part people mess up. Since you’re going to add things that are going to tighten up the risotto, you want more liquid than the rice can hold at this point. Then, I added my grated cheese, a few knobs of butter, some olive oil, and served it immediately.
You’re probably thinking, “wait a minute! Where did the mushrooms and the steak come from?”
While all that stuff was happening above, I worked on cooking the steaks in the cast iron skillet and sauteing the mushrooms.
There was nothing magic about cooking the steaks. Actually, I used this technique.
For the mushrooms, in a frying pan, I heated some oil and added the sliced mushrooms along with some salt and pepper. I was going for very clean flavors, just the mushrooms in all of their earthy glory.
Once I had all of the components cooked (see above image “The whole meal”), I tried two different plating techniques.
For Cassie, I served the steak and risotto side-by-side.
For me, I got cute and positioned the steak around the risotto.
I honestly liked the way Cassie’s presentation came out better, but I will probably never serve steak next to my risotto again. The juices from the steak muddled into the risotto a little too much. Next time, I’m not gonna break the rules and I’m gonna serve the risotto as a starter, on it’s own.
The risotto came out excellent, probably my best ever! I have never actually cooked mushroom risotto before until this adventure. I never appreciated the flavor or texture of mushrooms enough to want to try it. In this case, the mushrooms had such a distinct flavor to add to the dish that it was a match made in risotto heaven. I would back off on the porcini next time; the flavor seemed to overpower the dish, but that’s not a bad thing at all, just unbalanced.
Here comes the rest of the risotto lesson:
Risotto is never, ever supposed to be tight, fluffy, or static. Risotto should pour, and when you put it on the plate, it should spread. A few weeks ago, a local restaurant was having a cooking competition and some pretty popular food people were trying to get me to vote for a risotto dish. I couldn’t vote out of principle, because the rice looked sticky and tight. I’m sure it tasted fine. Go ahead and scroll up to my pictures of the finished risotto above if you want to see what it’s supposed to look like.
A recent walk through a local farmers market lit a bulb in my head for something I’ve been wanting to make for a while but just never really get around to it.
There’s a stand that sells high end specialty dried pasta at the Troy Farmers Market on occasion. While many of the flavors of their pastas are water soluble and I feel would wash into the boil, there are a few rare pastas made with alternative grains that catch my eye. One week, they had Emmer Fettuccine, which the young lady explained to me as fettuccine made from the original grain used to make pasta. Some quick research on the internet led me to find that emmer is another cute name for farro, which I have some familiarity with. Anyway, I bought some with the intent of making pasta carbonara. [They only had cracked up stuff from the bottom of the bag, but why wouldn’t this make a good dish?]
For those of you who do not know, pasta carbonara is literally bacon, egg, and cheese pasta. In fact, these are the main four ingredients, and the fifth is black pepper. Lets get proportions out of the way first. For each serving, you’ll need 1/4 lb of dried (or fresh) pasta (really any kind or cut you want), 3-4 slices of bacon (or better yet, pancetta, or even better yet, guanciale, but use what you have), one large egg, 1/2 cup of pecorino romano cheese (or any sheeps milk cheese that you like), and 1/2 tsp of black pepper (If you don’t like that much pepper, back off on it, but I can assure you that it’s intentionally supposed to be too much.). Additionally, every kitchen should be equipped with a tub of kosher salt and bottle of nice olive oil.
Cut up the bacon into small pieces and brown these just until crispy…
finely grate the cheese…
Crack the eggs into a bowl…
Lightly scramble the eggs along with most of the cheese, a dash of salt, and the black pepper…
Remove the bacon pieces from the oil onto a plate with some paper towel and drain the oil into a container.
When you’re ready to assemble the dish, have a pot of copiously salted, boiling water ready and cook your pasta to just under aldente.
Place the same pan you used to cook the bacon back onto the burner now set to low-medium heat. Transfer (approimately) 1/2 tbsp of olive oil and 1/2 tbsp of bacon fat back to the pan. Add the cooked pasta to the pan and don’t worry if you get a little water in there (it’s going to help thicken the “sauce.”). Toss the pasta in the oils and add the egg/cheese/pepper mixture and bacon pieces. At this point, remove from the heat and continue tossing for 20-30 seconds; you don’t want to fully scramble the egg.
Taste it. Adjust the seasoning, then plate your pasta and garnish with the remainder of the cheese.
The farro fettuccine has a firm, brittle texture and very strong wheat flavor, almost like buckwheat; I actually think that it stands up well against the smoked bacon and the cheese. The pepper adds a flavorful bite to the dish, especially if you use fresh cracked stuff (which you always should). Fettuccine may not have been the best cut of pasta for this dish, but I really wanted to try the farro pasta against something bold. This came out very good.
The beauty of carbonara is that you can assemble this dish in the time it takes to cook most pasta. And with five ingredients, it couldn’t be simpler.
While making this dish, it was brought to my attention (by Cassie) that there are versions of this recipe circulating around the world that include cream. Investigation into this has led me to find that people as famous as Giada di Laurentis and Nigella Lawson are spreading this around. Look, I’m not the guy to tell you not to do something you want to do, but there’s no cream in traditional carbonara. I’m sure it’s very good with cream (how could it not be?), but I prefer to not let my carbonara mix with my alfredo.
If you want to eat like derryX, you’re going to have to learn how to make gnocchi. Don’t worry it’s not hard at all.
Each portion starts with one fist-sized baking potato. You also need a teaspoon of extra virgin olive oil, one egg white, 1/4 teaspoon of kosher salt and 1/3 to 1/2 cup of whole wheat flour. Scale this however you must.
Start with the potatoes.
Coat the potato in olive oil and sprinkle with kosher salt. Bake at 450 °F until tender. Basically, if you would split it open and add bacon, cheese, sour cream, and butter, it’s ready. Allow it to cool slightly while you gather the rest of the ingredients.
While the potato is still warm, discard the skin and mash up the potatoes with the back of two forks.
Add a teaspoon of extra virgin olive oil, one egg white, 1/4 teaspoon of kosher salt and 1/3 of whole wheat flour into the bowl. Work the ingredients into the potato using the two forks. It will eventually get too difficult to handle with the forks; at that point, dump the remaining flour onto the board in a pile. Use a little bit to scatter flour on your board and add your mix on top of the dusted counter. Work the dough with your hands, incorporating some of the flour from the pile if it is too wet. When it reaches a consistency not unlike Play Doh, you are done. Do not overwork the dough, as gnocchi are supposed to be nice and light; overworking will result in chewy, horrible gnocchi.
Roll your dough into a dowel, almost an inch in diameter. Cut the dowel into 3/4 inch segments (or whatever size you want, you’re the one doing it). If you don’t want to get fancy, you’re done, just don’t expect any sauce to stick to them. You can make these fancier if you just take each dumpling and roll it on a fork with your thumb.
(The above picture is about one potato worth)
[Work quickly; you’re fighting the oxidation of the iron in the potatoes. If you let the dough or gnocchi sit around a while, they will get dark because of this. They will taste fine.]
To cook these, boil a huge pot of copiously salted water and drop them in. Nicely. Stir the water so they don’t stick to the bottom. Once they all float, they’re ready.
Dress your gnocchi however you wish. Sauce will stick nicely to the grooves fashioned by the fork and the dimple from your thumb.
What did I do? I took this 100 steps forward. I actually was trying to recreate a dish that I love to eat at my favorite Albany restaurant, The Wine Bar on Lark, Grilled steak with tasso and gnocchi Hash with braised cipollini onions. That was the inspiration, at least. I knew I was in over my head.
I got some nice looking cipollini at the Troy Farmers Market. I don’t remember the vendor. The only people selling cipollini.
These spent 60 seconds in a pot of boiling water, after which the root ends were cut off and the outer layer removed from each. I then braised these in a shallow pan with 1 tablespoon of butter and 1 tablespoon of olive oil.
I cooked these about 8 minutes per side on a medium heat, paying close attention to not caramelize the onions. Then I added a splash of balsamic vinegar.
I found this delicious balsamic vinegar at The Meat House. They actually have it in a huge jug and let you bring your container back for refills.
I broiled off some flank steak from Falvo, because that’s what I had around. I like my flank steak rare. If you don’t, don’t eat rare steak; I don’t know what to tell you.
In a pan nearby, I diced up some locally produced Canadian bacon I found at The Meat House and browned that in some olive oil. [Tasso ham is tough stuff to find around here.]
I added some balsamic vinegar to this, actually a lot, maybe 1/3 cup, to deglaze, and tossed my gnocchi with this olive oil-Canadian Bacon-balsamic vinegar. When the gnocchi started sticking to the pan, I added a bit of the starchy water from the gnocchi.
When it was all finished, here’s what it looked like:
And I can’t think of anything in this dish that is bad for you.
As far as I’m concerned, a dining experience is what you make of it. It doesn’t have to be a shirt and tie affair with linens and fine China all the time. Actually, it really doesn’t ever need to be like that, but you do what you wish.
Hey, food trucks are making it big nowadays, so I really don’t care what you think.
Parivar Spices and Food, located at 1275 Central Ave in Albany, NY, is a grocery store with a small kitchen in the back. There are a couple of small tables where you can enjoy your food or you can take it to go. I recently stopped in for a few ingredients and decided to have a snack. It turns out, that snack was a whole meal.
After I gathered the ingredients I needed from the dry part of the store, I made my way to the back and inspected the prepared items in the case. Everything looked amazing. I then complicated matters even further by reading the menu. This was a day that I didn’t want to overdo the carbs, so I decided to go with samosa chaat. The dish is classically deep fried chickpea and potato dumplings covered in a chick pea masala (stew) and various chutneys and raita (yogurt). That’s exactly what this was.
Puzzled?
So was I!
This looked nothing like I expected it to. I though to myself, “what is that? Ramen Noodles???!!”
I dug in and finally saw what looked like what I expected to see.
What is complicated about a dish like this is that there are so many components, each comprised from so many ingredients, that everything could muddle together. This was the first time I’ve ever experienced this dish where that did not happen. I could distinguish every component.
The chana masala (chick pea stew) was extremely fresh and deep in flavor. The chick peas were not over cooked and had an appreciable crunch; the earthy seasonings, especially coriander, really brought the flavor of the chick pea out. When submerged in this stew, the samosa, which normally has a very thick crispy exterior, starts to absorb the liquids from the stew; this leads to a contrast in textures that adds a complexity to what you’re tasting. Sure, let it sit around, and you’ll have a soggy mess. That’s why they have tables there.
Anyway, the chutneys were spot on. The tamarind chutney was sweet and tart just as you’d expect. The mint chutney was nice and spicy. The raita brought a creaminess to the dish that really helped to homogenize the texture of the chick peas.
Brilliant.
Ohh. Yeah. Those ramen noodle looking things. I really had no experience with that stuff, so I walked around the store after I ate. I found it in the store. That stuff is called sev and is a chick pea chip or something. A young lady I work with explained this as the “potato chip of India.” Actually, that’s what I named it after she described how they make it to me. It’s basically a deep fried chick pea mixture that is sold in various forms and is eaten as a snack food.
In this particular application, it is added as a crunchy textural counterpoint. Classically, the dish doesn’t need it, but I gotta say, it really did make this dish stand out among all of the other samosa chaat I’ve ever eaten.
And making a customer remember something is a very valuable thing.
One Friday, I got ready to eat a healthy portion of steak with nothing on the side. It’s part of my high protein, low carb plan which has led to a great deal of success for me this year. Let me rewind. I follow my plan pretty religiously Monday-Thursday, sometimes Friday. Seven well-timed meals, all protein packed. If you want to eat like derryX, you’re going to have to eat steak
This particular Friday, I had made it to the gym every day from Monday through Friday, so I mentally justified a carb packed meal for myself. Hey, if you don’t allow yourself any leeway, you’re never going to make progress. Of course, you have to do it in moderation.
So I converted the steak into a steak sandwich, a slightly over-the-top steak sandwich.
Every over-the-top sandwich starts with bread. I found an decent looking fresh semolina roll at Price Chopper. I hollowed that sucker out and spread out added a garlic-herb butter (recipe: butter, fresh garlic, oregano, salt, pepper) as well as a nice splash of extra virgin olive oil.
Then I worked on getting my steak ready.
It was already ready. I basically broil up a well-seasoned whole London broil or flank steak and freeze 5-6 oz portions. All I needed to do was reheat one portion (concurrently with the bread in a 400 degree F oven), maybe season it just a touch with salt, pepper, and a splash of extra virgin olive oil.
While this was in the oven, I got my other ingredients ready.
When the bread had a light toast, I threw some mozzarella slices on it, and threw it under the broiler for a couple of seconds.
I laid out the steak onto the bread, and closed the lid.
And I cut it in the oddest fashion I could think to cut it.
It was really great. The mozzarella, a fairly mild cheese, did a great job adhering to both the steak and the bread, making a nice, happy, loosly bound sandwich family. My sandwich is not something that’s overly moist. I didn’t add more than 1/2 tbsp of butter and maybe 1/2 tbsp of olive oil, the steak is a fairly lean cut, and the cheese is has low moisture. I don’t think it needs to be moist. It’s steak on cheesy garlic toast, for God’s sake.
I do enjoy the bread to be hollowed out. It’s not that I was trying to save carbs, because I believe if you’re gonna do it, you gotta do it. I just think the bread to meat ratio would have been way too unbalanced without removing some of the bread. Plus both sides get nicely crisp, not to mention hollowing creates a well that contains the steak, meaning that you wont squeeze the steak out of the other side when you take a bite. You know, like when you bite into a burger and it flies out of the back of the bun.
So, if you’re trying to eat the way I eat, and are sick of eating just steak, make yourself a sandwich.
I firmly believe that the biggest mistake people make in life is using the “Popcorn” button on the microwave.
It just never works the way its supposed to.
My experience with the button is that, for regular sized bags of microwavable popcorn, it results in a half to two thirds popped bag of corn with a bunch of unpopped kernels. For miniature sized bags, it burns the popcorn.
Yes I know this is 2011, but I need to instruct those of you who do not know how to use a microwave to pop any bags of popcorn designed for the microwave. Also, a variation of these instructions should be printed on each bag of microwavable popcorn that you purchase, so c’mon guys, follow directions and skip the dumb button.
Remove the cellophane wrapper from your bag.
Open microwave door.
Place it in your microwave with the side labeled “This side up” facing up.
Close microwave door.
Set the microwave to something greater than 3 minutes. 4 minutes is a safe number
Hit “Start” or “Go” or whatever button your microwave has to make it begin the microwaving process.
Listen carefully; You’ll hear nothing for a while, then you’ll hear a lot of popping. When the popping subsides to 2 or so seconds between pops, hit your “Stop” button.
Let the bag sit in the microwave for about 15 seconds.
Open the microwave and proceed to enjoy your unburned popcorn and minimal unpopped kernels.
Nine steps seems like a lot, but it is a small price to pay to not need to heat oil in a large pot and pop your own kernels.
But seriously, though, buy an air popper, and stop using that stupid button on the microwave.
Generally, going out to eat can get expensive. On top of that, you really don’t know how they’re cooking your food or what is even in it.
A favorite breakfast of mine is the corned beef hash and two scrambled eggs at Route 7 Diner in Latham, NY. There are a few things that make this a less than optimal regular breakfast experience. The first is proportions. They say it consists of two scrambled eggs; I don’t know how big the chicken they got these eggs from is, but there seems to be much more than 2 eggs. Another is the quality of the corned beef hash. It’s clearly from a can. While I do enjoy canned corned beef hash, you can do better, especially in the capital region.
I’m here to tell you that you can do even better yet. And it’s really easy. Here’s what I did (some preparation at least a day before assembly is required):
I went to Falvo’s Meat Market and asked for half of a raw, pickled corned beef brisket. I was kind of an idiot for this because I failed to realize that this would not yield as much as I expected. Ohh well; next time, I get the whole brisket. I boiled a pot of water, added the brisket and simmered that sucker for 4 hours, as instructed by the gentleman at Falvo’s. After extraction from the water, I allowed it to cool and placed it in a container in the fridge.
Also ahead of time, I diced up some raw sweet potatoes and boiled these in a copious amount of water. I drained these and allowed them to cool then placed them in a container in the fridge.
On the morning that I wanted to eat corned beef hash, I took a vidallia onion and diced about 1/4 of it. I also diced about 4 oz of corned beef and set aside about 4 oz of sweet potatoes.
I melted about 1/2 tbsp of butter into 1/2 tbsp of olive oil and heated the pan to a good medium-high.
I tossed the onions, corned beef, and sweet potatoes into the hot pan and allowed it to cook without agitation for a few minutes.
(Bonus points if you comment with the reason that I use wooden spoons exclusively with my stainless steel pans)
While this was working, I cracked two eggs into a bowl with 1/2 tbsp of milk and a pinch of kosher salt and some cracked pepper.
I whipped these guys up and, in a separate frying pan, I melted a small pat of butter and scrambled them to light firmness.
While all of this was happening, I mixed the hash a couple of times. When that reached the desired crispiness, I placed it on a plate with a well down the center, and added the eggs to the well.
I like lots of pepper on my eggs, so I cracked some more over the top. I enjoyed this dish so much! Plus, I have little containers with the components in the fridge and can toss them in a pan and have this any time!
I did brush over a major point of controversy, though. Corned beef hash is traditionally made with white potatoes. Yea, I know this. My hash uses sweet potatoes. I have a few reasons for this. The most important two reasons are that I prefer sweet potatoes to white potatoes, and it is my recipe. Also important are the fact that sweet potatoes are lower on the glycemic index than white potatoes, and I have a shirt that I need to continue fitting into. You want white potatoes? Use white potatoes; it’s your life.
A highlight of my summer is getting fresh basil from my parents’ garden. They grow this stuff by the cubic ton.
This year, for Fathers Day, I gave my dad a few plants of Thai basil, which has a faint anise flavor, and purple basil, which tastes like regular green basil. Apparently, they grew like crazy, and he brought me a humongous bucket of those two and regular green basil. I wanted to see what it would be like to make pesto mixing the three.
I started by lightly toasting some pine nuts.
I added some fresh garlic and some olive oil to a blender.
My olive oil of choice this time was Merro Extra Virgin (always extra virgin).
I had a huge amount of basil, the three varieties described above.
I blended the hell out of the basil, adding a few leaves at a time to the oil. When it got too thick, I added a little more oil. Throughout the addition of basil, I adjusted the salt and pepper levels. I was mindful of the consistency of mixture and of the salt content because I still had to add grated cheese, which would thicken it and make it saltier. Once all of the basil was incorporated, and I had a fairly loose mixture. I added grated cheese, a mixture of Parmigianno and Pecorino, but not by blending; I incorporated the cheeses using a spoon for reasons that should be blatantly obvious.
Why do I mix cheeses? Parmigianno is a great cheese, but it’s fairly mild and doesn’t stand up against the strong basil and olive oil on its own. By adding pecorino, which is a more pungent cheese, you get a bit more sharpness, which is what I like, remember, this is being made to my tastes, which is also why there are no proportions throughout this recipe.
I don’t think there was enough Thai basil in there to affect the overall flavor of the pesto. Remember, it’s a whole lot of basil up against garlic, pine nuts, cheese, and olive oil, all of which are pretty strong flavors. The handful of Thai basil leaves, which taste slightly different from standard basil, isn’t gonna shift the flavor that much. The overall color of the pesto was darker than my usual pesto batches; this is totally expected.
When all was said and done, I put the pesto in some of my finest plastic containers.
…and it’s all waiting in the freezer for a suitable application
Here’s another simple “recipe” for you. Actually, I was looking for a way to get some protein into an arugula salad, and I came up with this with what I had around.
I buy these minute steaks from Falvo’s Meat Market; they’re basically very thin slices of beef (top round, I think) that cook up on a very hot skillet. They’re basically fresh Steakums, except not terrible. Best part is, these steaks are something like $3.99/lb.
I took 8 oz of these steaks, added some salt and black pepper, and grilled them up on my griddle.
While these were cooking, I tossed some arugula with some salt, pepper and lemon juice,
I piled the seasoned arugula on top of the cooked steak,
I drizzled the entire plate with a generous amount of olive oil. I used something from my The Olive Press Sampler Pack,
…and I had a yummy, protein packed, fresh meal. In under five minutes including cleanup.
…and, at this point, you probably recall that I’ve prepared something similar before.